


Setting a Static IP for Raspberry Pi
https://phoenixnap.com/kb/raspberry-pi-static-ip
Setting a Static IP in Ubuntu
https://www.freecodecamp.org/news/setting-a-static-ip-in-ubuntu-linux-ip-address-tutorial/
How to Set a Static IP Using the GUI
- Search for Settings.
- Click on either the Network or Wi-Fi tab, depending on the interface you would like to modify.
- To open the interface settings, click on the gear icon next to the interface name.
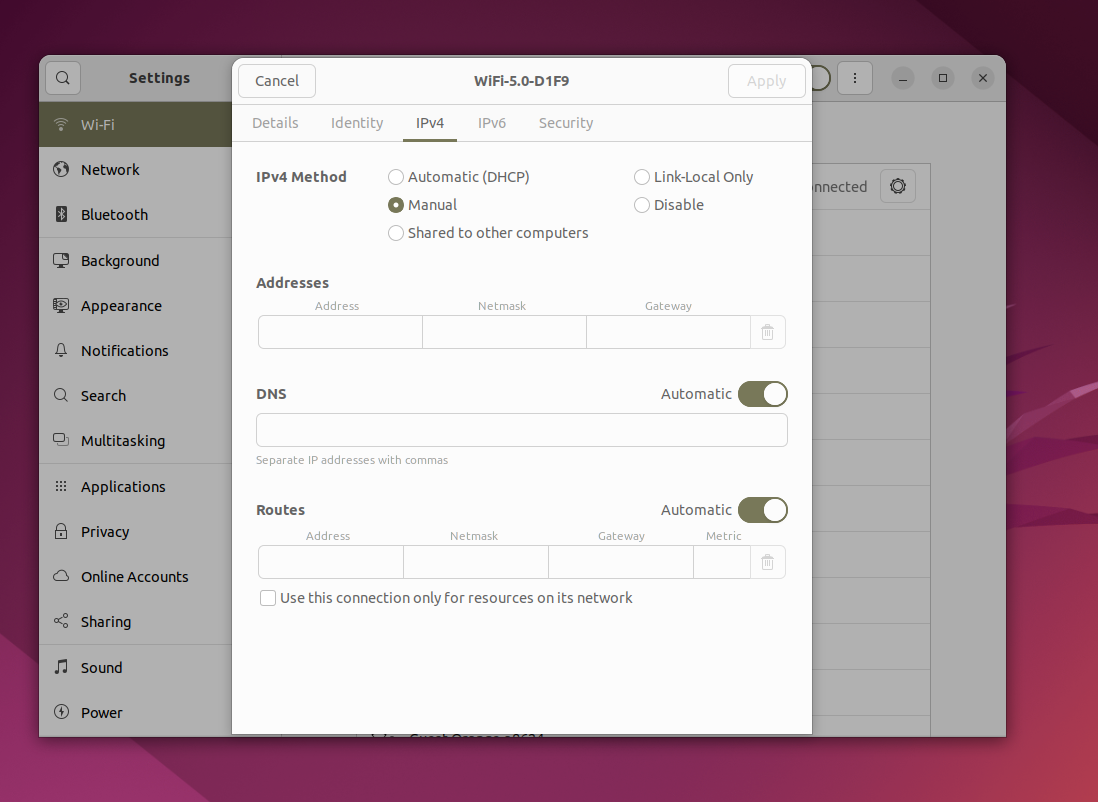
- In the IPv4 tab, select Manual and enter your static IP address, Netmask, and Gateway.
- Click on the Apply button.
Choosing a static IP address
Ensure the chosen IP won’t interfere with your router’s automatic assignments and that your device remains accessible on the same network.
-
Check Your Router’s IP Range
- Access your router’s configuration page by typing its IP address into a browser (typically
192.168.1.1or192.168.0.1). - Look for the DHCP settings page. This will show the range of IP addresses that your router automatically assigns to devices on the network.
- Example: Your router might assign addresses from
192.168.1.2to192.168.1.100.
- Access your router’s configuration page by typing its IP address into a browser (typically
-
Choose an IP Outside the DHCP Range
- Pick a static IP address that is outside the range your router uses for DHCP to avoid conflicts.
- For instance, if your router assigns addresses up to
192.168.1.100, you can choose something like192.168.1.150or192.168.1.200.
-
Keep IPs in the Same Subnet
- The static IP address you choose must be in the same subnet as your router’s network.
- If your router’s IP is
192.168.1.1, your Raspberry Pi’s static IP should also start with192.168.1.X(e.g.,192.168.1.150). - Avoid choosing IPs too low (e.g.,
192.168.1.2) or too high (e.g.,192.168.1.254) as these could be reserved for the router or network management purposes.
-
Avoid Conflict with Other Static IPs
- Make sure no other device on the network is using the IP address you select. You can check connected devices in your router’s interface to ensure there is no overlap.
-
Test Your IP
- Test IP using ping or other network tools to ensure it works as expected.
ping 192.168.68.1  # Replace with your router's IP
ping google.com    # Check internet connectivity
ping 8.8.8.8 # Google
Example Setup:
- Router IP:
192.168.1.1 - DHCP Range:
192.168.1.2to192.168.1.100 - Static IP for Pi:
192.168.1.150